This site has been running on Piranha CMS version 9 for 18 months and in that time, Piranha CMS 10 was released with several improvements, the most notable of which being .NET 6 support. I've been meaning to upgrade to Piranha CMS 10 for a while but had not tackled it yet because I thought it would be a bigger lift. As it turns out, upgrading was rather simple. For anyone in this same situation, this tutorial outlines the process for upgrading Piranha CMS version 9 to 10.
Upgrade NuGet Packages
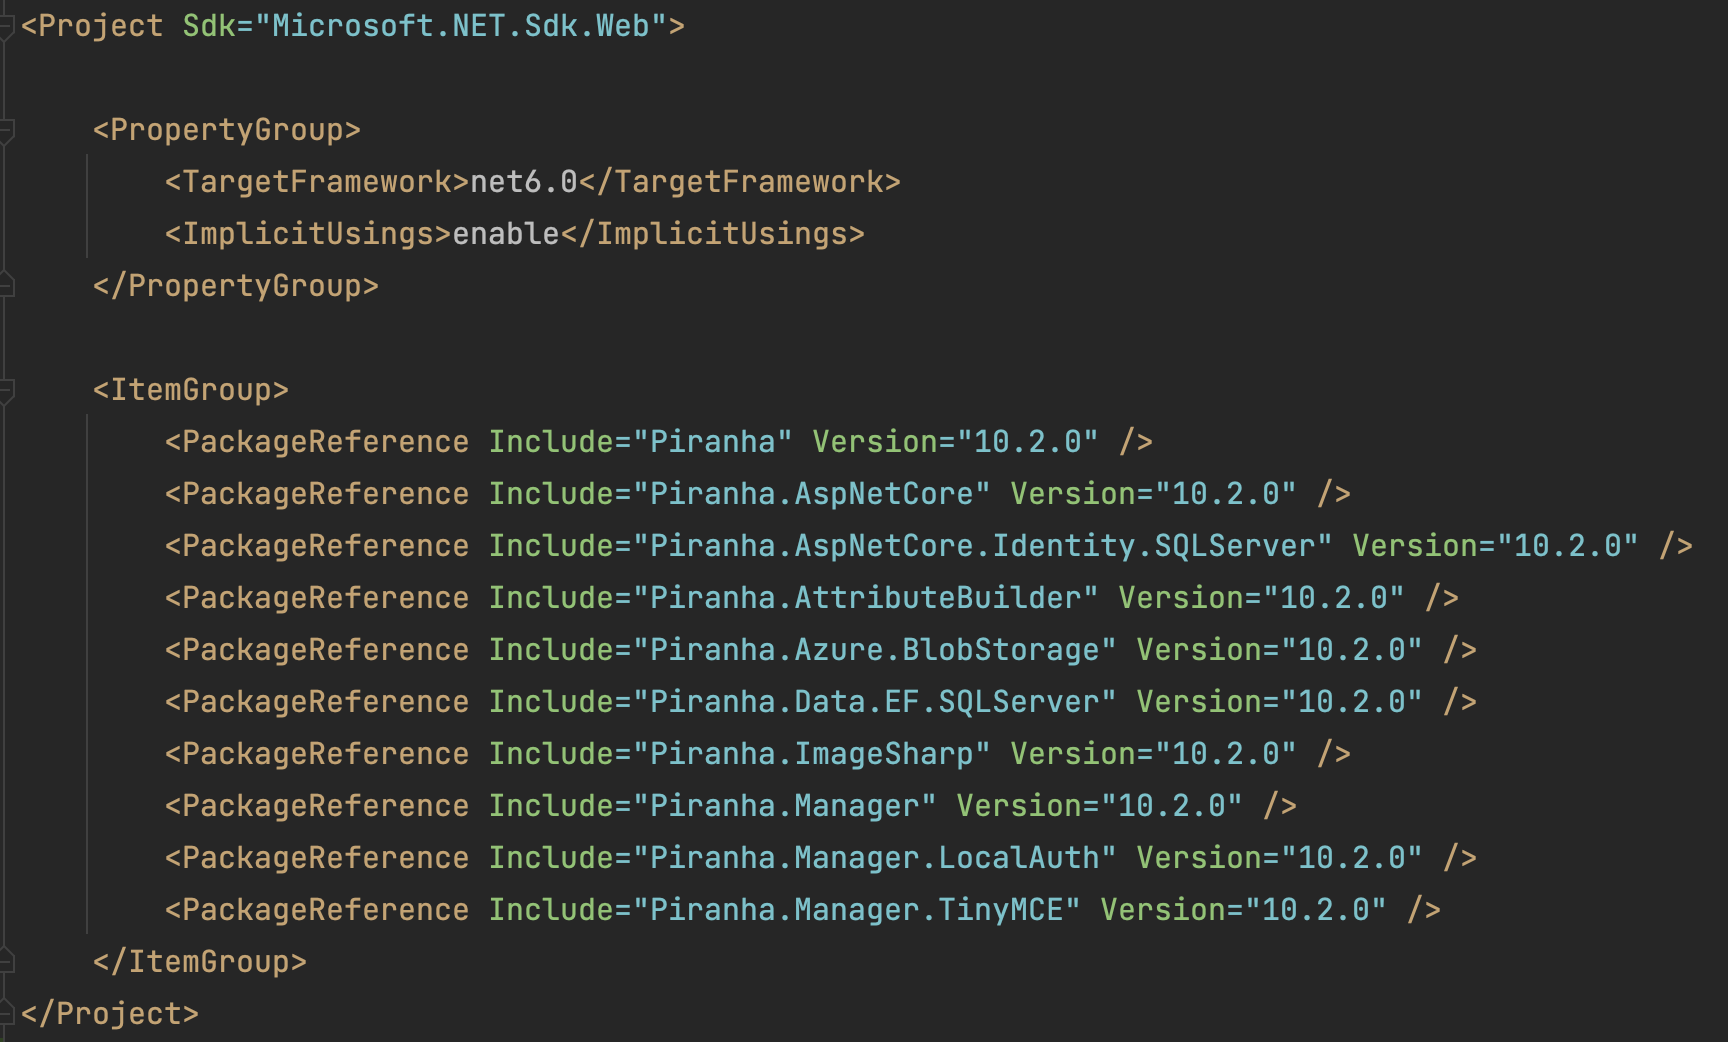
The first step in the process is to upgrade all of the relevant Piranha CMS NuGet packages to the 10.* versions. At the time of this writing, the most recent packages available were version 10.2.0. You can update the Piranha NuGet packages in several ways, but one of the fastest methods is to simply edit your *.csproj file and manually enter the updated package version numbers. Depending your individual database and storage needs, you should end up with the following updated packages:
- Piranha • 10.2.0
- Piranha.AspNetCore • 10.2.0
- Piranha.AspNetCore.Identity.SQLServer•10.2.0
- Piranha.AttributeBuilder • 10.2.0
- Piranha.Azure.BlobStorage • 10.2.0
- Piranha.Data.EF.SQLServer • 10.2.0
- Piranha.ImageSharp • 10.2.0
- Piranha.Manager • 10.2.0
- Piranha.Manager. LocalAuth • 10.2.0
- Piranha.Manager.TinyMCE • 10.2.0
Your updated *.csproj file should look similar to following snippet:
<ItemGroup>
  <PackageReference Include="Piranha" Version="10.2.0" />
  <PackageReference Include="Piranha.AspNetCore" Version="10.2.0" />
  <PackageReference Include="Piranha.AspNetCore.Identity.SQLServer" Version="10.2.0" />
  <PackageReference Include="Piranha.AttributeBuilder" Version="10.2.0" />
  <PackageReference Include="Piranha.Azure.BlobStorage" Version="10.2.0" />
  <PackageReference Include="Piranha.Data.EF.SQLServer" Version="10.2.0" />
  <PackageReference Include="Piranha.ImageSharp" Version="10.2.0" />
  <PackageReference Include="Piranha.Manager" Version="10.2.0" />
  <PackageReference Include="Piranha.Manager.LocalAuth" Version="10.2.0" />
  <PackageReference Include="Piranha.Manager.TinyMCE" Version="10.2.0" />
</ItemGroup>
After you've finished updating your NuGet packages, make sure to restore NuGet packages using your preferred method.
Update Target Framework Version
The next step in the process is to update the Target Framework version to net6.0 and enable Implicit Usings. Here again, the quickest way to achieve this is by editing your *.csproj file directly and updating the Property Group as seen below:
<PropertyGroup>
  <TargetFramework>net6.0</TargetFramework>
  <ImplicitUsings>enable</ImplicitUsings>
</PropertyGroup>
After you've completed the updates to your *.csproj file, it should look similar to the screenshot below:
Update Program.cs
One of the major changes between .NET 5 and .NET 6 ASP.NET applications is that Startup.cs file has effectively been deprecated and replaced with configuration in the Program.cs file. This means that you'll need to move your service and application configuration into the Program.cs file. For the most part, this is a 1:1 port from your Startup.cs file with some minor adjustments, the biggest of which being that configuration must be accessed using builder.Configuration. Additionally, .NET 6 no longer requires explicit namespaces, classes or Main method declarations in the Program.cs file. For the sake of brevity, your completed Program.cs file should be similar to the following:
using Microsoft.EntityFrameworkCore;
using Piranha;
using Piranha.AttributeBuilder;
using Piranha.AspNetCore.Identity.SQLServer;
using Piranha.Data.EF.SQLServer;
using Piranha.Manager.Editor;

var builder = WebApplication.CreateBuilder(args);

builder.AddPiranha(options =>
{
    if (builder.Environment.IsDevelopment())
    {
        options.AddRazorRuntimeCompilation = true;
    }

    options.UseCms();
    options.UseManager();

    var blobStorageConnectionString = builder.Configuration.GetConnectionString("blobstorage");
    options.UseBlobStorage(blobStorageConnectionString, naming: Piranha.Azure.BlobStorageNaming.UniqueFolderNames);
    options.UseImageSharp();
    options.UseTinyMCE();
    options.UseMemoryCache();

    var connectionString = builder.Configuration.GetConnectionString("piranha");
    options.UseEF(db => db.UseSqlServer(connectionString));
    options.UseIdentityWithSeed(db => db.UseSqlServer(connectionString));
});

var app = builder.Build();

if (app.Environment.IsDevelopment())
{
    app.UseDeveloperExceptionPage();
}

app.UsePiranha(options =>
{
    // Initialize Piranha
    App.Init(options.Api);

    // Build content types
    new ContentTypeBuilder(options.Api)
        .AddAssembly(typeof(Program).Assembly)
        .Build()
        .DeleteOrphans();

    // Configure Tiny MCE
    EditorConfig.FromFile("editorconfig.json");

    options.UseManager();
    options.UseTinyMCE();
    options.UseIdentity();
});

app.Run();
Clean and Build
After you've updated your Program.cs file, it's time to build your project. Because you updated to .NET 6, it's best to perform a Clean + Build in order to get all of the .NET 6 SDK dependencies in place prior to running your project. If all goes well, your project will build on the first attempt and you will be ready for a test run.
Important! - Before deploying your updated site, you'll want to test in a non-prod environment. This site in particular runs on Azure, so my de-facto testing / development method is to restore a bacpac file from my Azure SQL database to my local SQL server, then update my appsettings.development.json file to point to that instance. Your setup will likely vary, but the important point is that you test the upgrade in some manner.
Deploying Piranha CMS 10
After testing and validation, the final step in the process is to deploy your application to production. The key here is to make sure your target environment has the .NET 6 runtime installed and is ready to support your updated project.
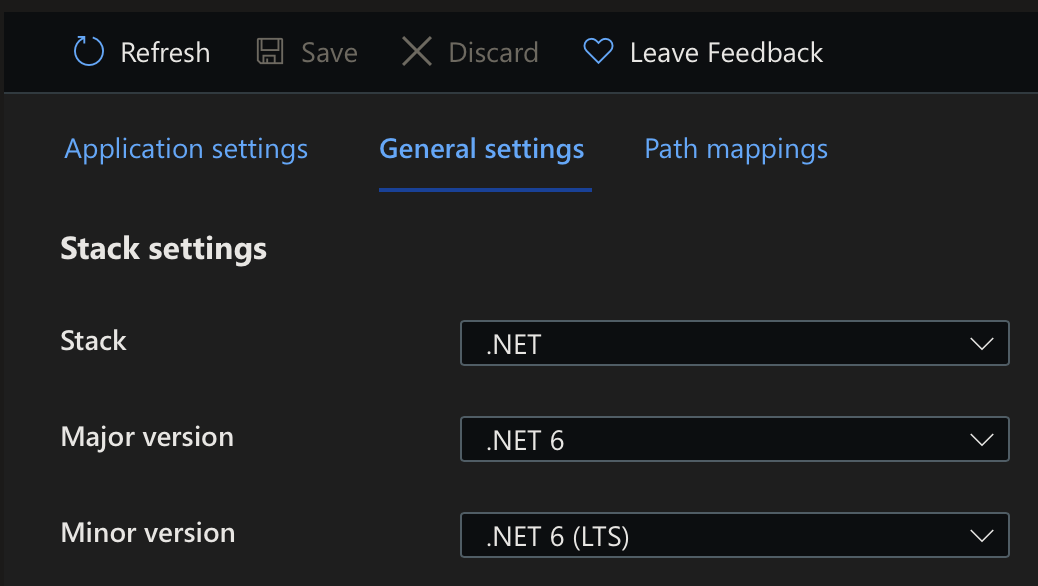
If your application runs on on Azure, you can easily set the your App Service to use .NET 6 from the Azure Portal. From the Azure Portal, navigate to your Azure App Service, select the Configuration menu option and click the General Settings tab. On this tab, set the Stack, Major Version and Minor Version options to .NET 6 and click the Save button. Afterwards, you should restart your App Service.
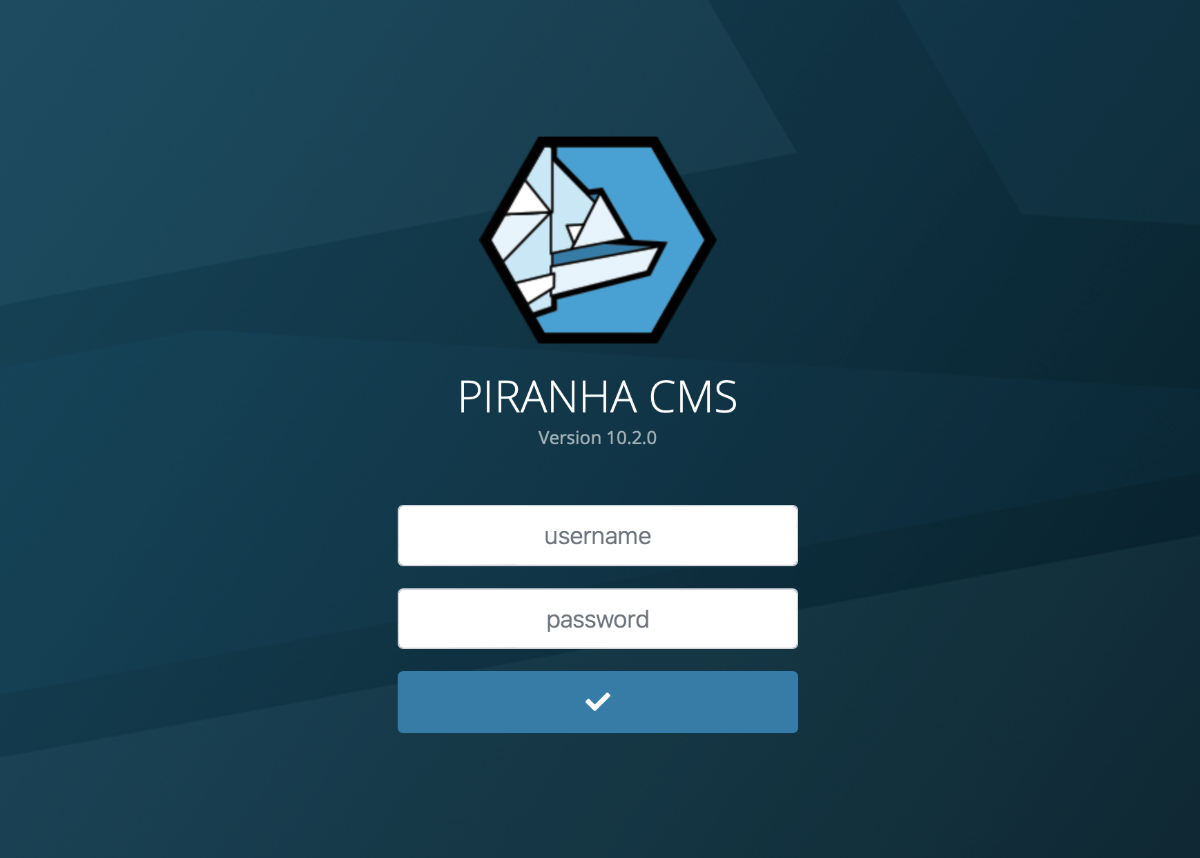
After you've successfully deployed your site, you should now see the Piranha CMS login page display version 10.2.0. Congratulations on successfully upgrading your site!