This post is part 5 in the series Deploying Piranha CMS to Azure.
In order for your Azure App Service to interact with other resources across your Azure subscription, you'll need to enable system Identity in your App Service. This system assigned identity will be managed by Azure and is necessary to enable your Azure resources to communicate securely.
Create an Azure App Service Identity
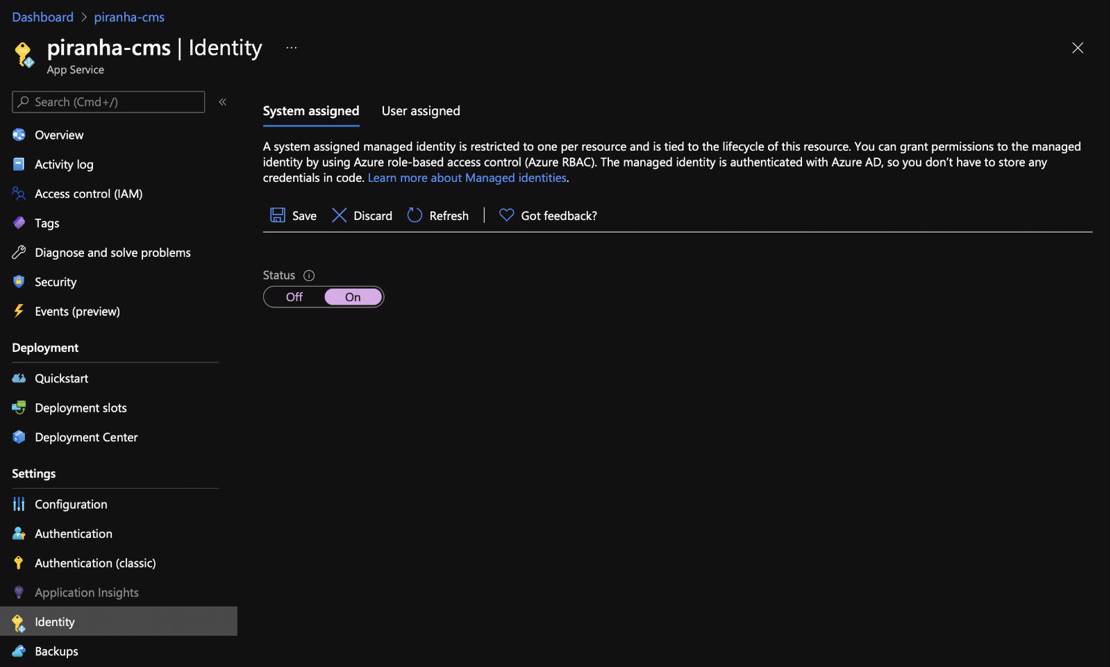
To begin creating an Azure App Service identity, launch the Azure portal at portal.azure.com, then navigate to your App Service (Dashboard > Resource Group > App Service) and locate the Identity tab in the left navigation pane. When the Identity panel loads, make sure you're on the System assigned tab, then set the Status option to On and click the Save button, as seen in the screenshot below.

After clicking the Save button, a prompt will appear asking you to confirm your choice to enable the system managed identity for your Azure App Service. Click the Yes button to proceed.

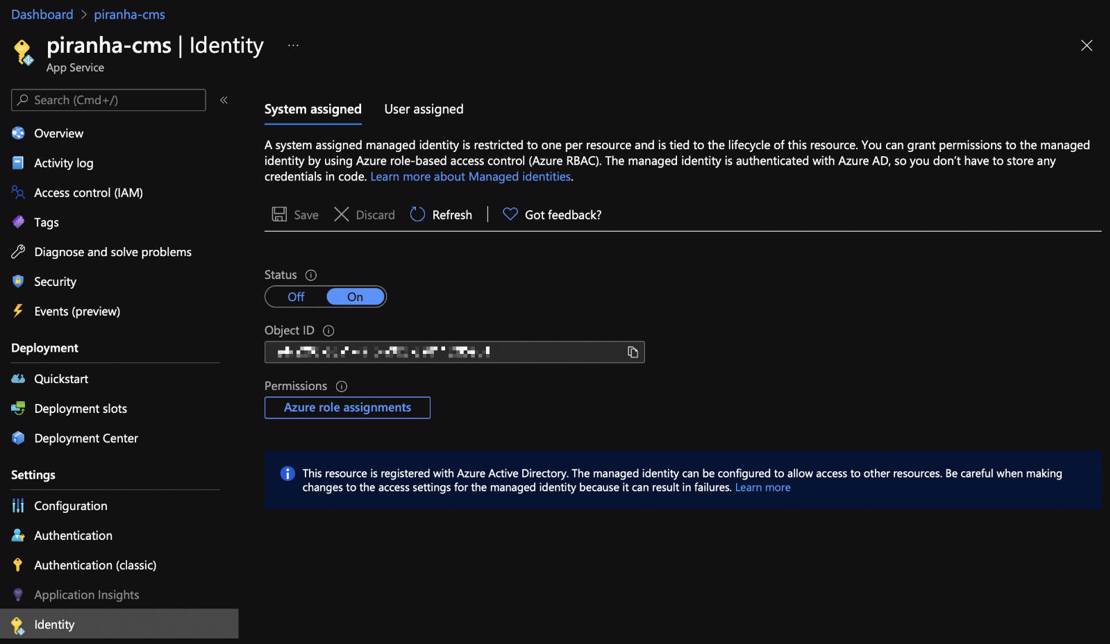
After confirming your choice, the Identity tab will be updated to reflect the newly created system identity for your App Service, as shown in the screenshot below. This identity will be used to configure access to the Azure Storage Account, which will provide secure Azure Blob Storage for your Piranha CMS instance.

Up next:

Part 6: Creating an Azure Storage Account
In order to use Azure Blob Storage, you'll first need to create an Azure Storage Account. An Azure Storage Account enables your Azure App Service, and other Azure resources, to securely store and retrieve various types of data. This account will effective... Read more
#azure #piranha-cms #cms #blob-storage #piranha #storage-account #tutorial