This post is part 3 in the series Deploying Piranha CMS to Azure.
In order to run a Piranha CMS instance on Azure, some configuration of your new site is necessary. These configuration changes include setting connection strings for Azure SQL Server and Azure Blob Storage.
Configuring Piranha CMS for Azure
In order to correctly update your Piranha CMS configuration to support Azure, make sure your terminal window is pointed to your project directory, then open VS Code using the command below:
code .
Alternatively, you can open your project from terminal window using the command below:
code ~/code/github/piranhacms
Once VS code is opened, you'll be presented with the project structure on the left hand of the editor, as shown in the screenshot in the next section. If prompted to trust the authors of the folder, restore assets or install missing resources, click yes or restore to all.
Edit App Settings
The next step in the process involves editing the connection strings section of the appsettings.json file. Following the standard .NET project settings structure, Piranha CMS uses the piranha and blobstorage properties to store the connection strings for your Azure SQL Server and Azure Blob Storage accounts respectively. When running your site in Azure, the values for these properties will be securely stored and retrieved from your Azure App Service configuration based on their names. Alternatively, if you're running Piranha CMS locally, you can edit these settings to point to your preferred database server or blob storage instance.
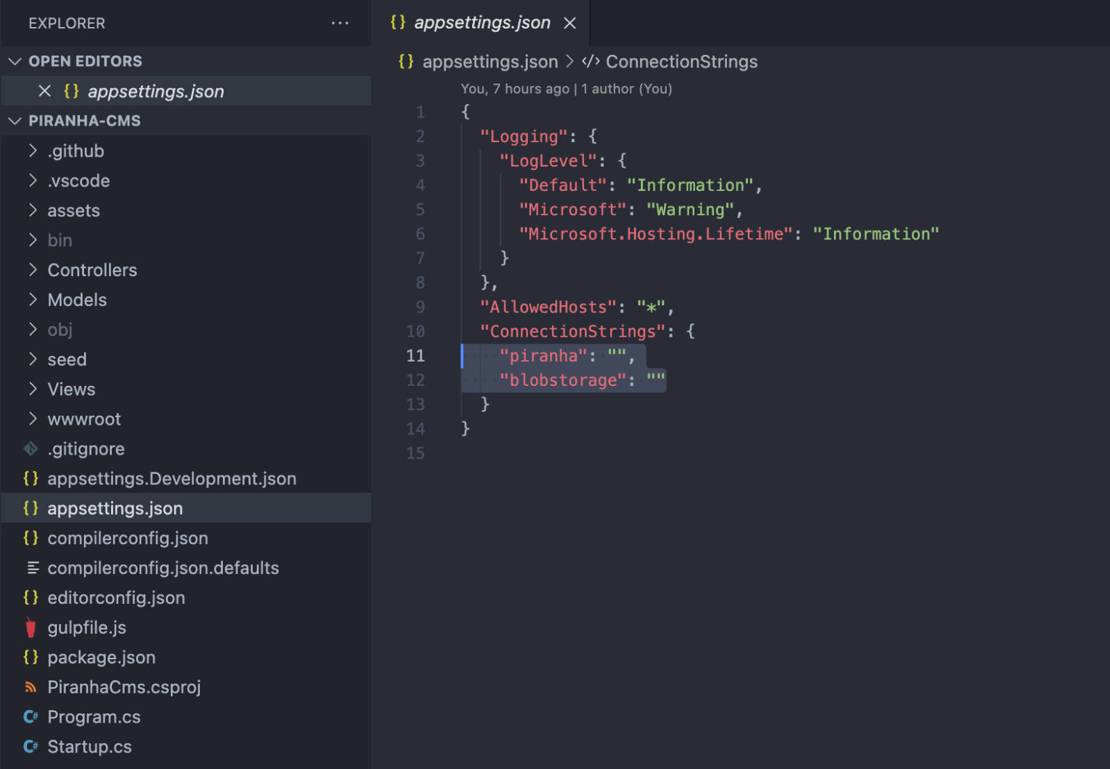
To properly configure these settings for Azure, open the appsettings.json file in VS code and simply set the values of the piranha and blobstorage properties to an empty string, as shown in the screenshot above. Save your changes.
The Need to Seed
During the first run of the site, Piranha CMS will present a seed option that will create sample content on your site. This process works very well when running the site locally, however, if you are following this tutorial and would like to seed data in Azure, you'll need to configure your project to include the seed folder during the publish process.
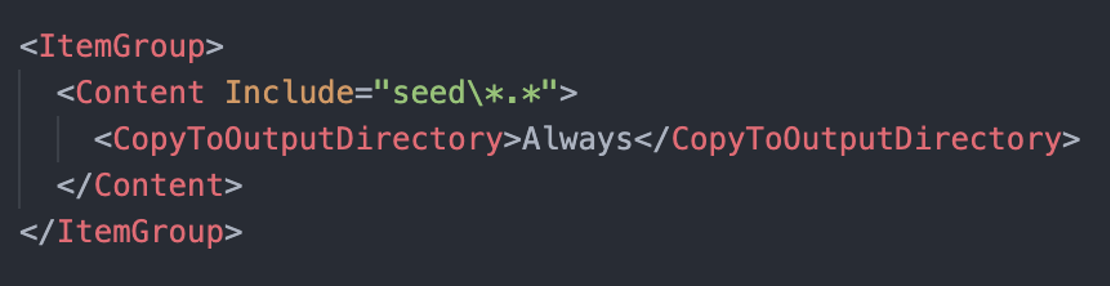
To do so, open the *.csproj file in VS Code, and add the following block of code somewhere between the <project> tags.
<ItemGroup>
  <Content Include="seed\*.*">
      <CopyToOutputDirectory>Always</CopyToOutputDirectory>
  </Content>
</ItemGroup>
At this point, save all of your changes, commit your code, and push your commits to your GitHub repository.
Up next:

Part 4: Creating an Azure App Service
The next step in the process involves creating an Azure app service to run your Piranha CMS instance. An Azure App service is essentially the Azure resource that will directly serve your Piranha CMS site files and will enable you to configure custom domai... Read more