This post is part 4 in the series Deploying Piranha CMS to Azure.
The next step in the process involves creating an Azure App Service to run your Piranha CMS instance. An Azure App Service is essentially an Azure resource that will directly serve your Piranha CMS site files and will enable you to configure custom domains, manage TLS / SSL settings, and scale your web app as traffic patterns change.
Creating an Azure App Service
Assuming you've already created an Azure account, launch the Azure portal at portal.azure.com and look for the Create a resource button in the top left corner of the page. When the Create a resource panel loads, search for Web App + Database and press enter. This will load a list of results, as seen in the screenshot below.
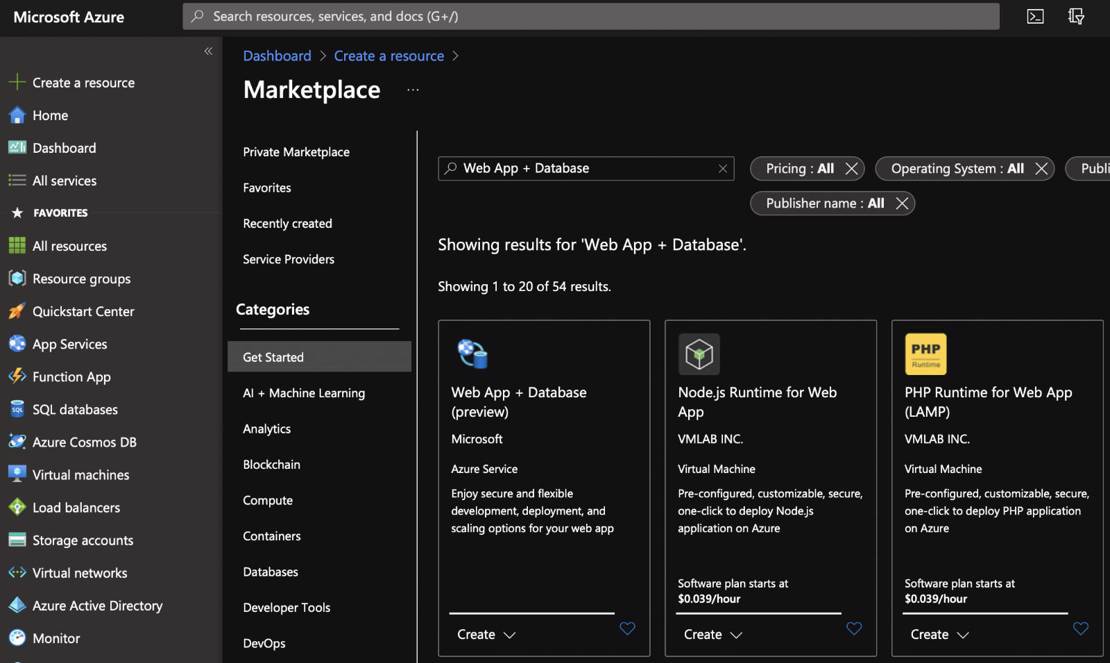
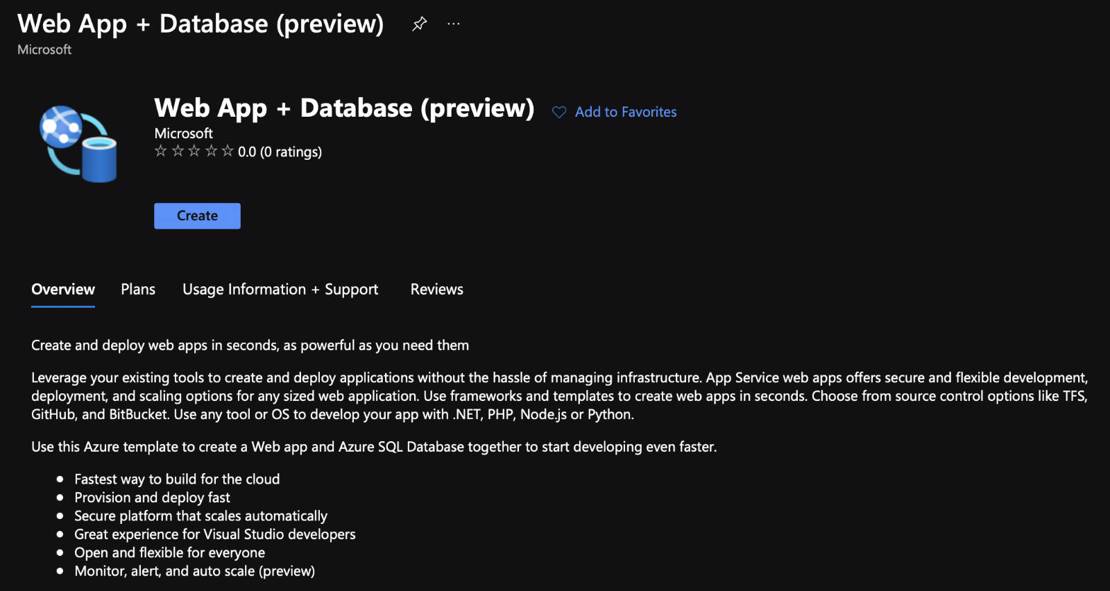
The first item in the search results is the Web App + Database option (still in preview at the time of this writing). Choosing this option will display an informational page that outlines all of the relevant details about this template. Most importantly, this template will provision a new Azure App Service and Azure SQL Server that will be used to power your Piranha CMS instance. From this page, click the Create button to begin creating your Azure App Service.
Create a Web App + Database
In the next page that appears, you'll want to enter the relevant details to configure your new Azure App Service. Most of these options can be set based on your specific needs, but I've outlined each option in detail in the section below.
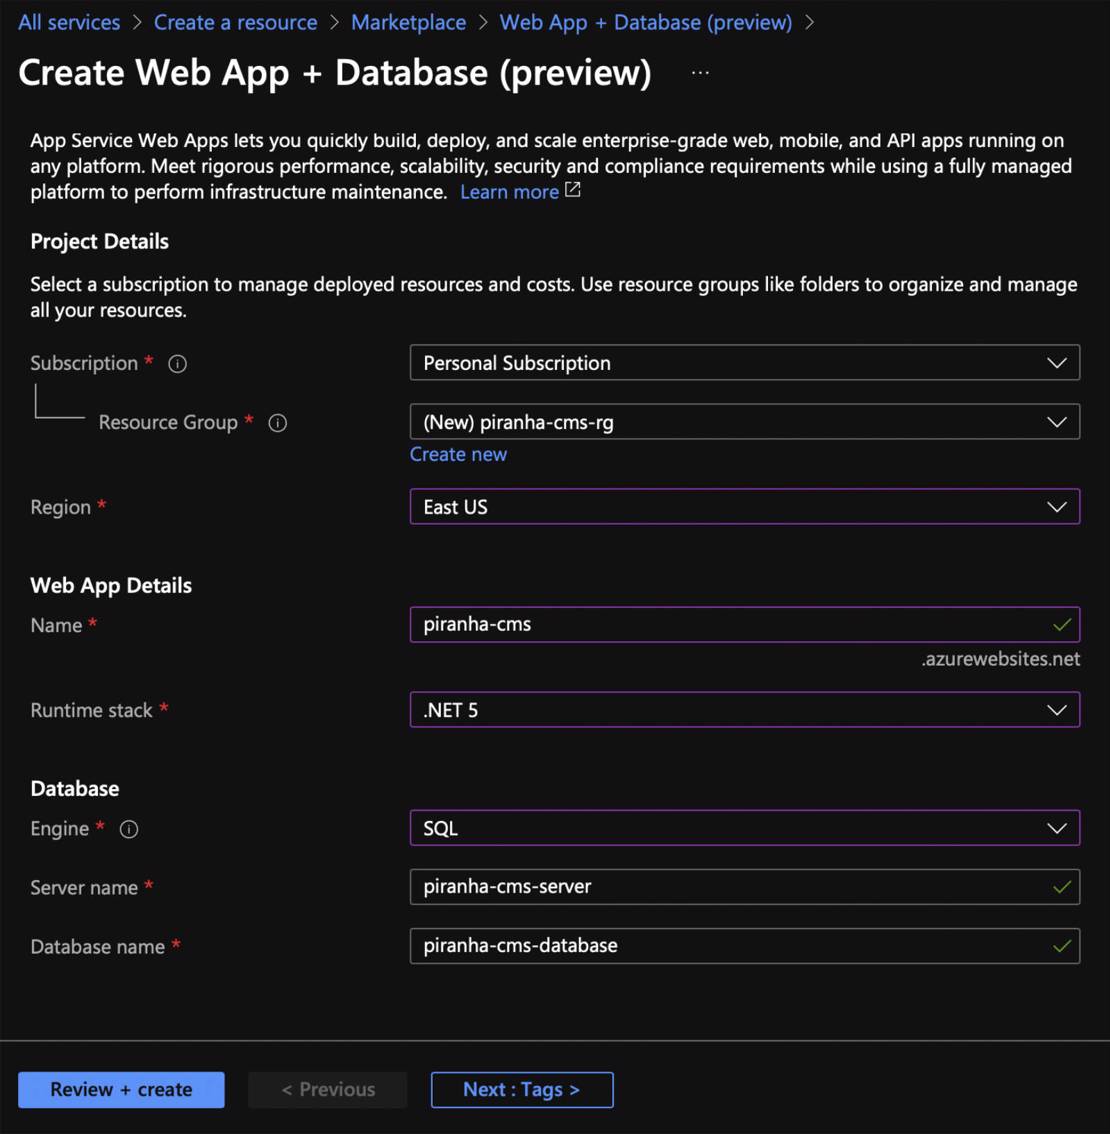
Project Details
- Subscription - This option will default to the subscription name you entered when you setup your account.
- Resource Group - This option will allow you to effectively group your resources together. My recommendation is to create a new resource group for your Piranha CMS instance.
- Region - Set this option to the appropriate region based on your location. In the example below, I'm using East US.
Web App Details
- Name - This option allows you to set the URL where your site will initially be accessible, but also doubles as the name of your app service. This name has to be unique across all of Azure.
- Runtime Stack - This option allows you to set the runtime for your web app. Set this option to .NET 5 to match the runtime for Piranha CMS 9.1.
Database
- Engine - This option allows you to set your preferred database engine. This tutorial is based on the SQL database provider, so choose the SQL option. Piranha CMS also supports PostgreSQL, however it requires installing the PostgreSQL database provider during project setup, which is outlined in part 2 of this tutorial.
- Server Name and Database Name - These options will be populated automatically based on the name you entered in the Web App Details section. You can alter these, but my recommendation is to leave the defaults.
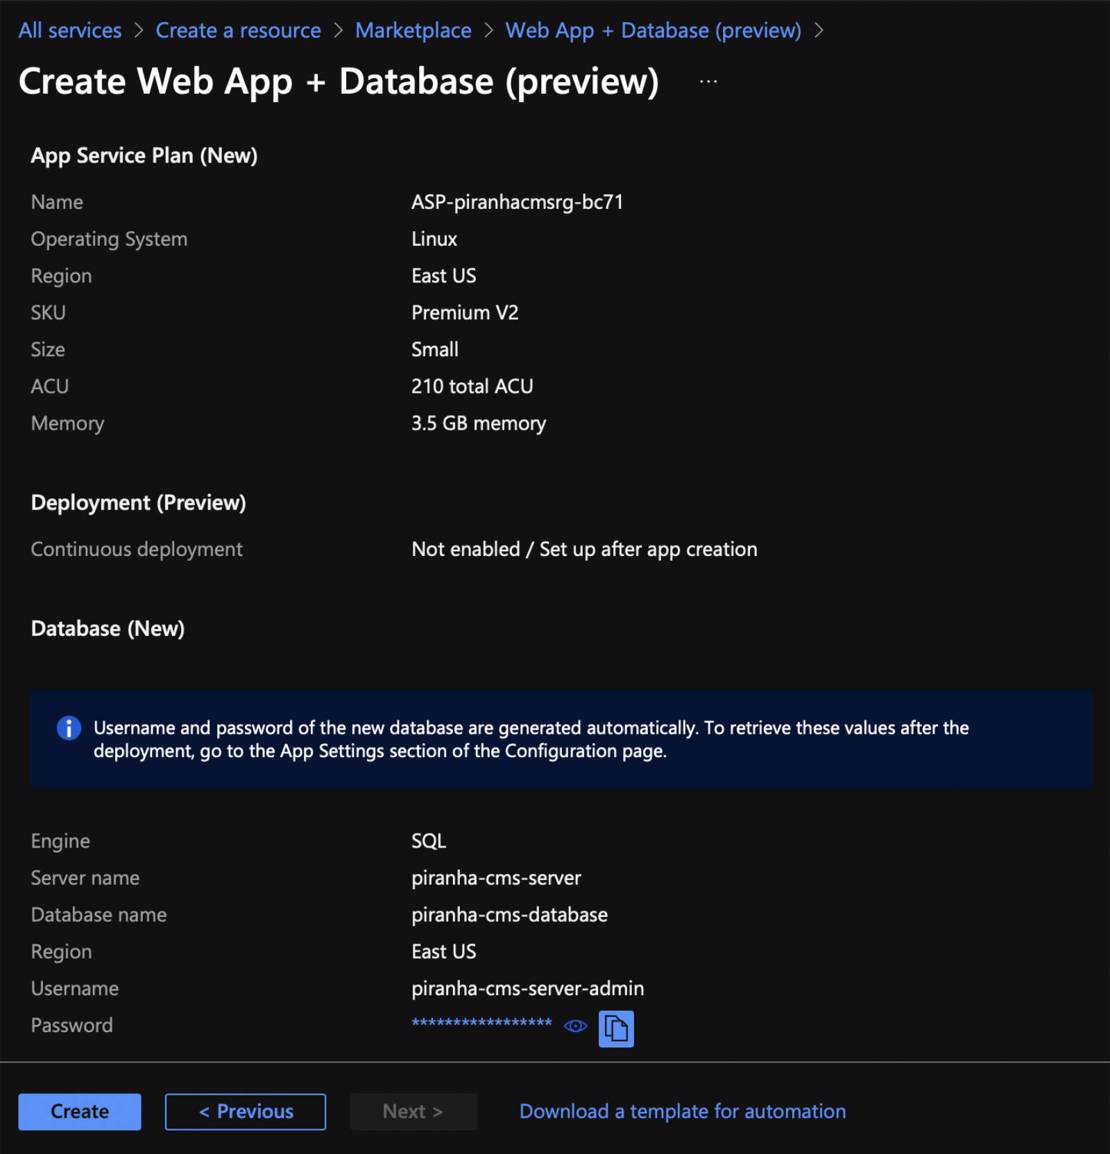
After entering all of the relevant details about your new web app, click the Review + create button. This will load a page outlining all of the relevant details about your new Azure App Service. Next, click the Create button to begin the deployment process for your new App Service. A page will be displayed that outlines the deployment process and will take several minutes to complete. Once complete, you'll have a fully provisioned Azure App Service and Azure SQL Server instance that will power your new Piranha CMS instance.
Bonus Points: Control Costs
By default, the Web App + Database template creates the Azure App Service and Azure SQL Server on a premium tier. These premium resources are likely overkill for your site, especially when you're just starting out. Although new Azure accounts include free resources and service credits, these will eventually run out and you be required to setup billing for your account. In order to control your costs and use only the resources you absolutely need, it's best to scale down your App Service and SQL instance to more appropriate tiers.
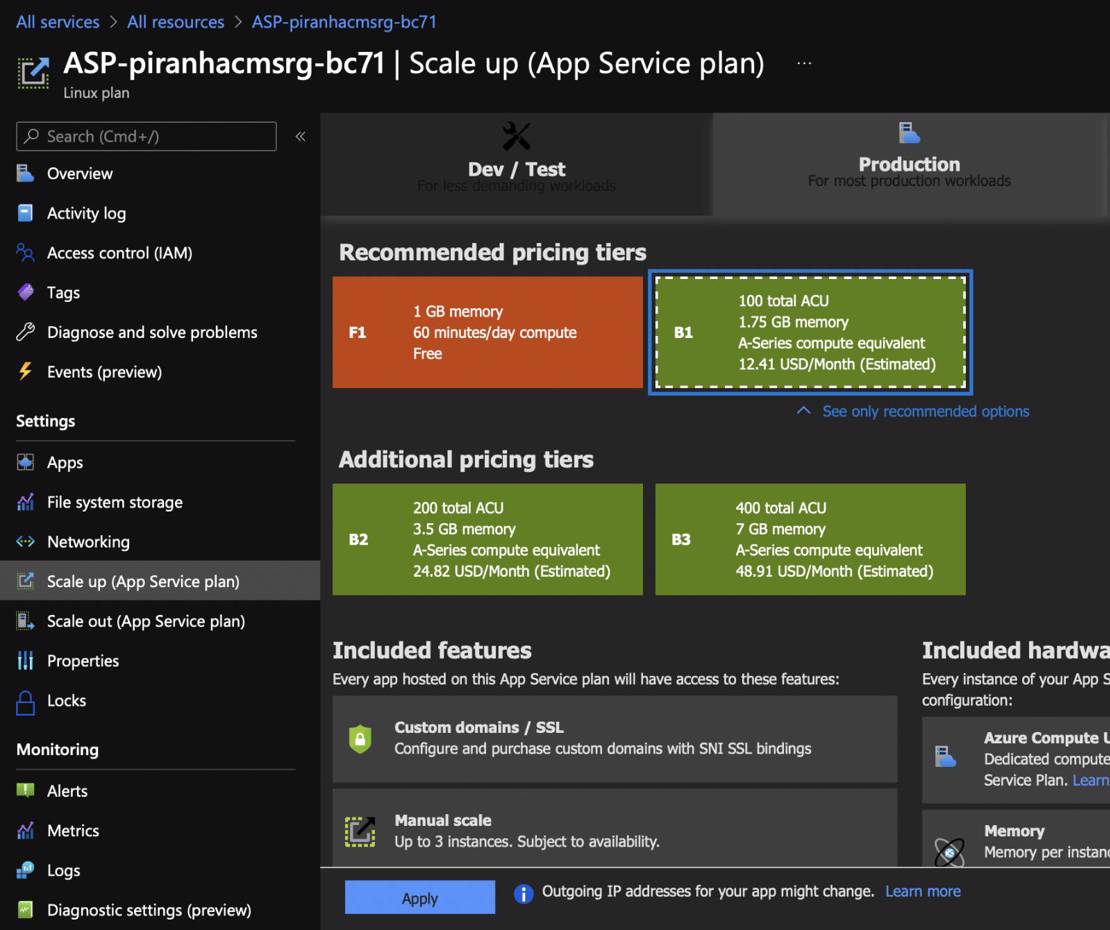
Scale Down App Service Plan
To scale down your App Service plan, navigate to your app service plan (Dashboard > Resource Group > App Service Plan) and select the Scale Up option in the left navigation pane. Next, select the Dev / Test tab, then look for the B1 pricing tier. I recommend this tier to start because it supports resource scaling and custom domains, however you should choose the option that best meets your needs and is within your budget. After making a selection, click the Apply button at the bottom of the page.
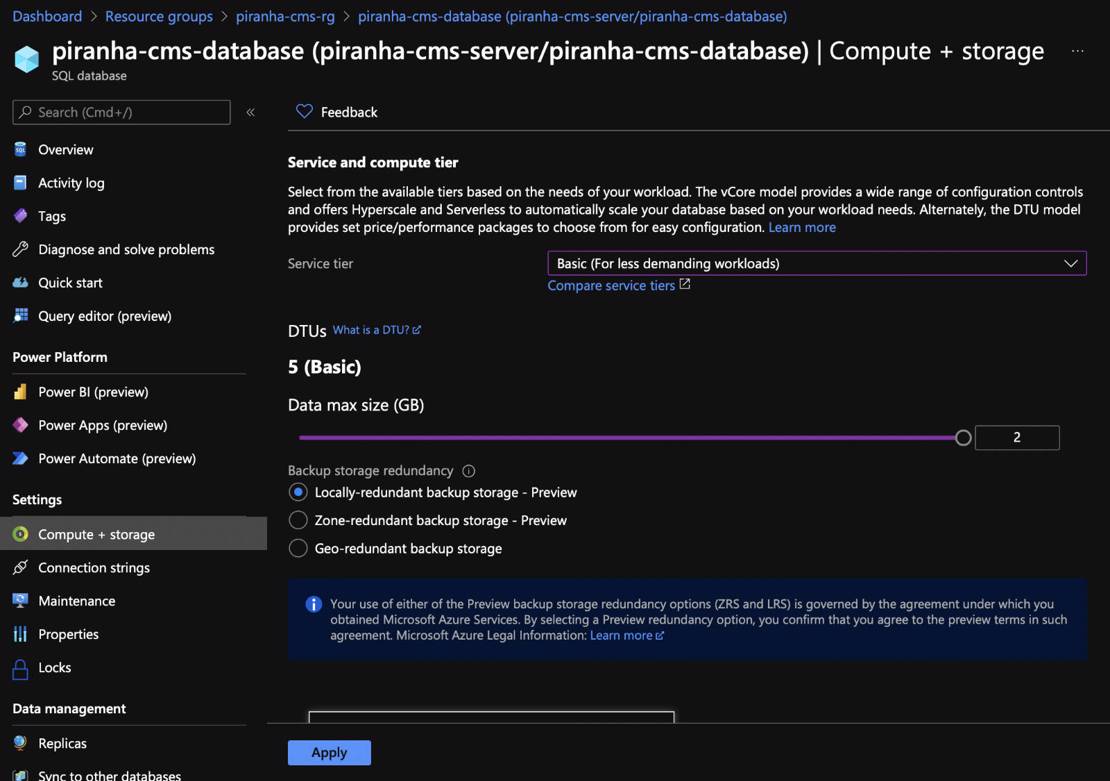
Scale Down SQL Compute + Storage
To scale down your SQL Database Compute + Storage options, navigate to your SQL database (Dashboard > Resource Group > SQL Database) and select the Compute + storage option in the left navigation pane. Next, select the Basic option in the Service tier dropdown list. Unless otherwise necessary, you should also select the Locally-redundant backup storage option as well. I recommend these options to start because they provide ample storage and availability, but again, you should choose the option that meets your needs and is within your budget. After setting these options appropriately, click the Apply button at the bottom of the page.
Up next:

Part 5: Configuring an Azure App Service Identity
In order for your Azure App Service to interact with other resources across your Azure subscription, you'll need to enable system Identity in your App Service. This system assigned identity will be managed by Azure and is necessary to enable your Azure re... Read more