This post is part 8 in the series Deploying Piranha CMS to Azure.
In order to enable your Piranha CMS instance to communicate with your Azure SQL Server and Azure Storage Account, you'll need to configure the connection strings in your Azure App Service accordingly. This process will involve editing the name of your Azure SQL database connection string as well as adding your Azure Storage Account connection string to your App Service configuration. The names that you enter for these connection strings should match the names you configured in the appsettings.json file in Part 3 of this series.
Configure Storage Account Connection String
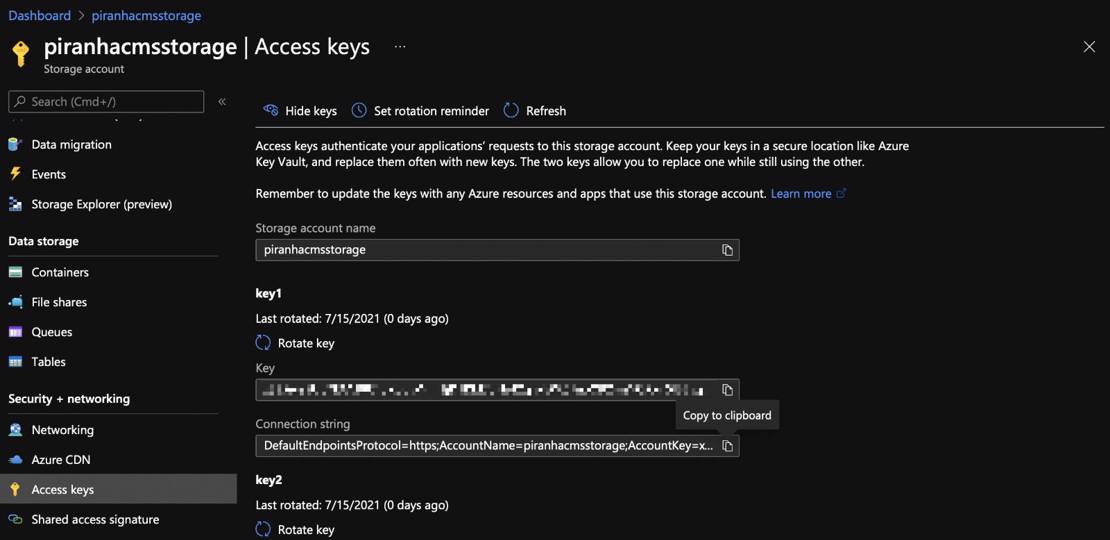
To get started, launch the Azure portal at portal.azure.com. Navigate to your Azure Storage Account (Dashboard > Resource Group > Storage Account) and select the Access keys option from the left navigation pane. In the Access keys panel, click the Show Keys button near the top of the page, then click the Copy to clipboard button on the Connection string text box. This is the connection string that will be added to your Azure App Service configuration.
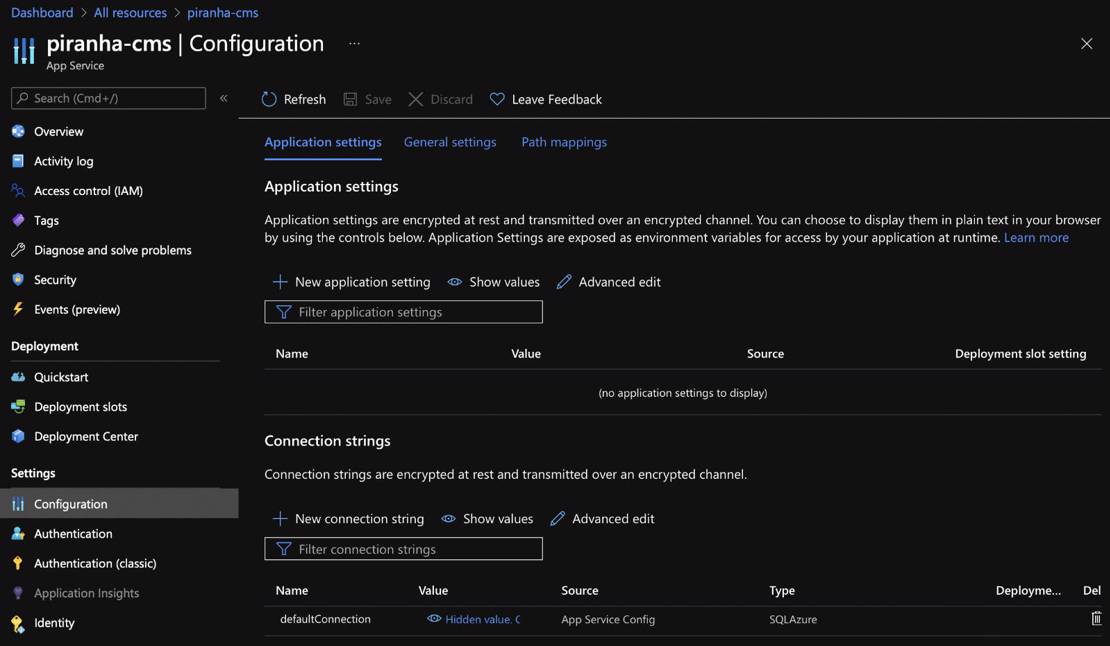
Next, navigate to your App Service (Dashboard > Resource Group > App Service) and select the Configuration option from the left navigation pane. In the Connection strings section, click the New connection string button, as seen in the screenshot below.
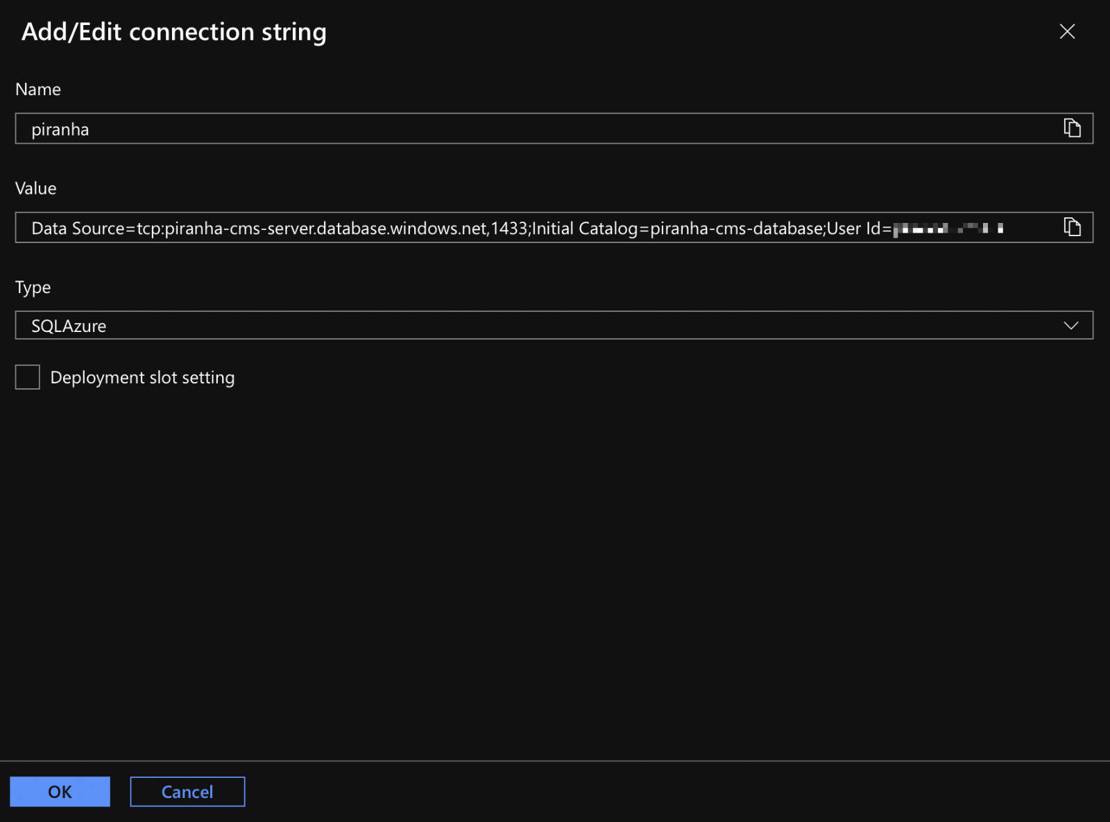
In the Add/Edit connection string panel, enter blobstorage in the Name text box and paste your Storage Account connection string in the Value text box. In the Type select list, select the Custom option, then click the Ok button.

Edit SQL Database Connection String Name
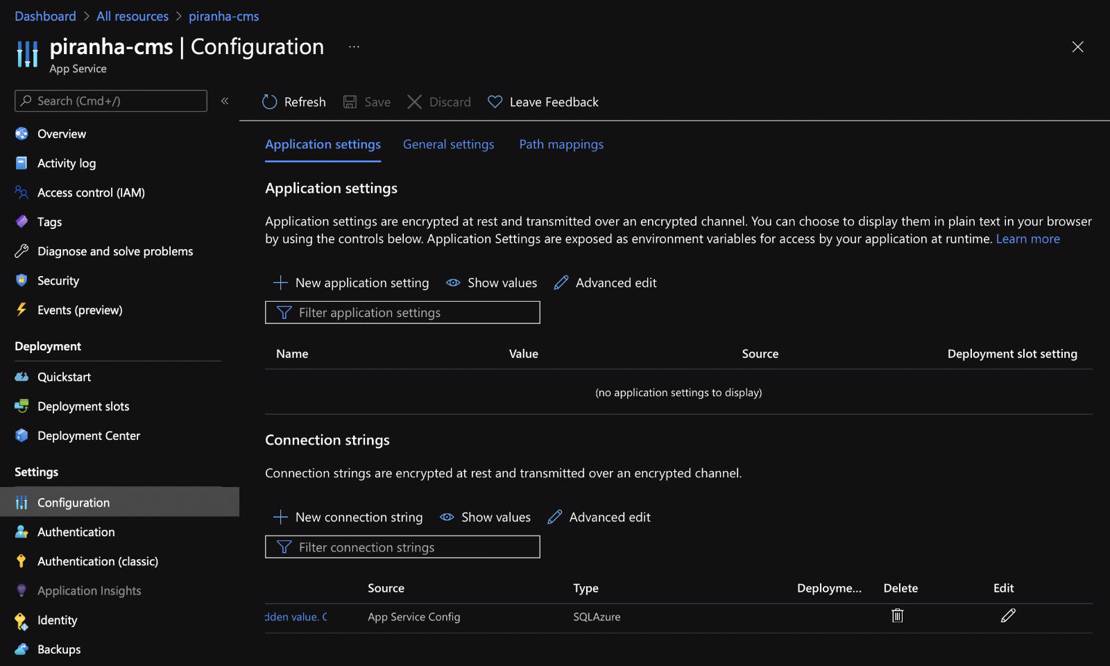
Next, you'll need to edit the name of your SQL database connection string. To do so, find the connection string titled defaultConnection in the Connection strings section, then click the Edit button in the row (last column in the row).
In the Add/Edit connection string panel, set the Name property to piranha, then click the Ok button.
The Connection strings panel should now reflect your changes. Verify that both the Azure Storage Account connection string and the Azure SQL connection string match the values displayed below.

Up next:

Part 9: Deploying Piranha CMS to Azure using GitHub Actions
Now that your Azure App Service, Azure SQL Server instance, and Azure Storage Account have all been configured to work with Piranha CMS, you are finally ready to deploy your project to Azure using GitHub Actions. At the end of this tutorial, you'll have a... Read more
#dotnet #azure #piranha-cms #app-service #cms #blob-storage #github #piranha #storage-account #sql #tutorial #vscode #git